Customizing your contact cards
Last updated: August 17, 2026
The contact panel in the dialer is built from tiles — cards you can rearrange, remove, and extend with data from your CRM, including Salesforce contact, account, and deal properties. This guide covers personal layouts, team-wide defaults, and every card type you can add.
In this article
How the card layout works
Entering edit mode
Moving and removing cards
Adding a card
Field cards: pick your own CRM fields
Bringing in Salesforce data
Deal and account properties
What each integration supports
How layouts are saved
Setting a team default (admins)
Troubleshooting & FAQ
How the card layout works
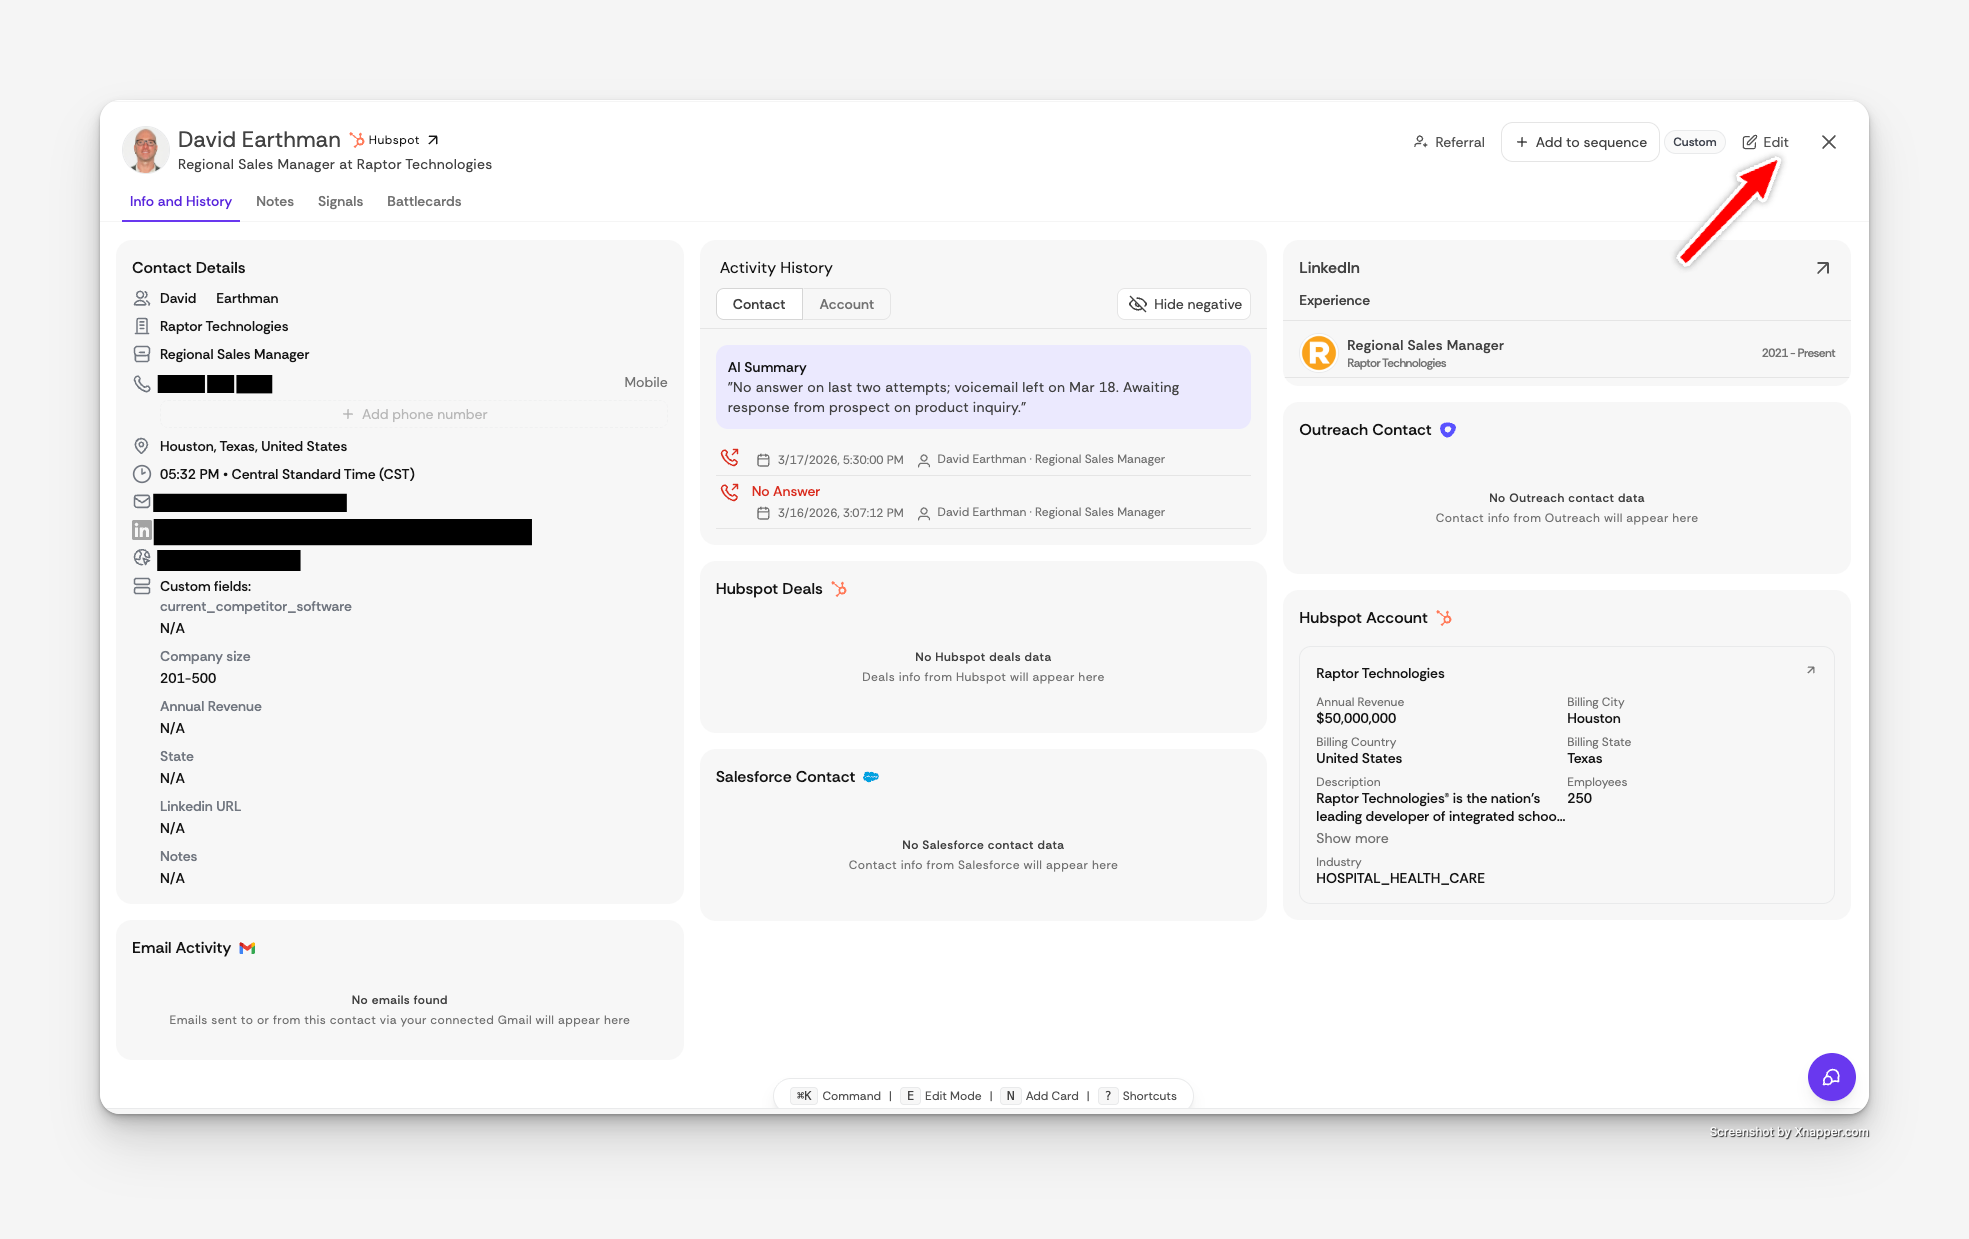
When you expand a contact in the dialer, their details open as a grid of cards arranged in three columns. Each card is an independent tile — some show Salesfinity data (Contact Details, Activity History), some pull from a connected integration (Salesforce Contact, HubSpot Deals), and some are AI-powered (AI Copilot).
Out of the box, the layout looks like this:
Column 1 | Column 2 | Column 3 |
|---|---|---|
Contact Details | Activity History | LinkedIn |
There are three layers of layout, and the most specific one wins:
Your personal layout — anything you customize yourself. Shown with a Custom badge in the panel header.
Team default — a layout your admin configured for the whole team. Shown with a Team default badge.
System default — the standard Salesfinity layout, used when neither of the above exists.
Entering edit mode
Open a contact
In Dashboard → Dialer, expand any contact to open the contact details panel.
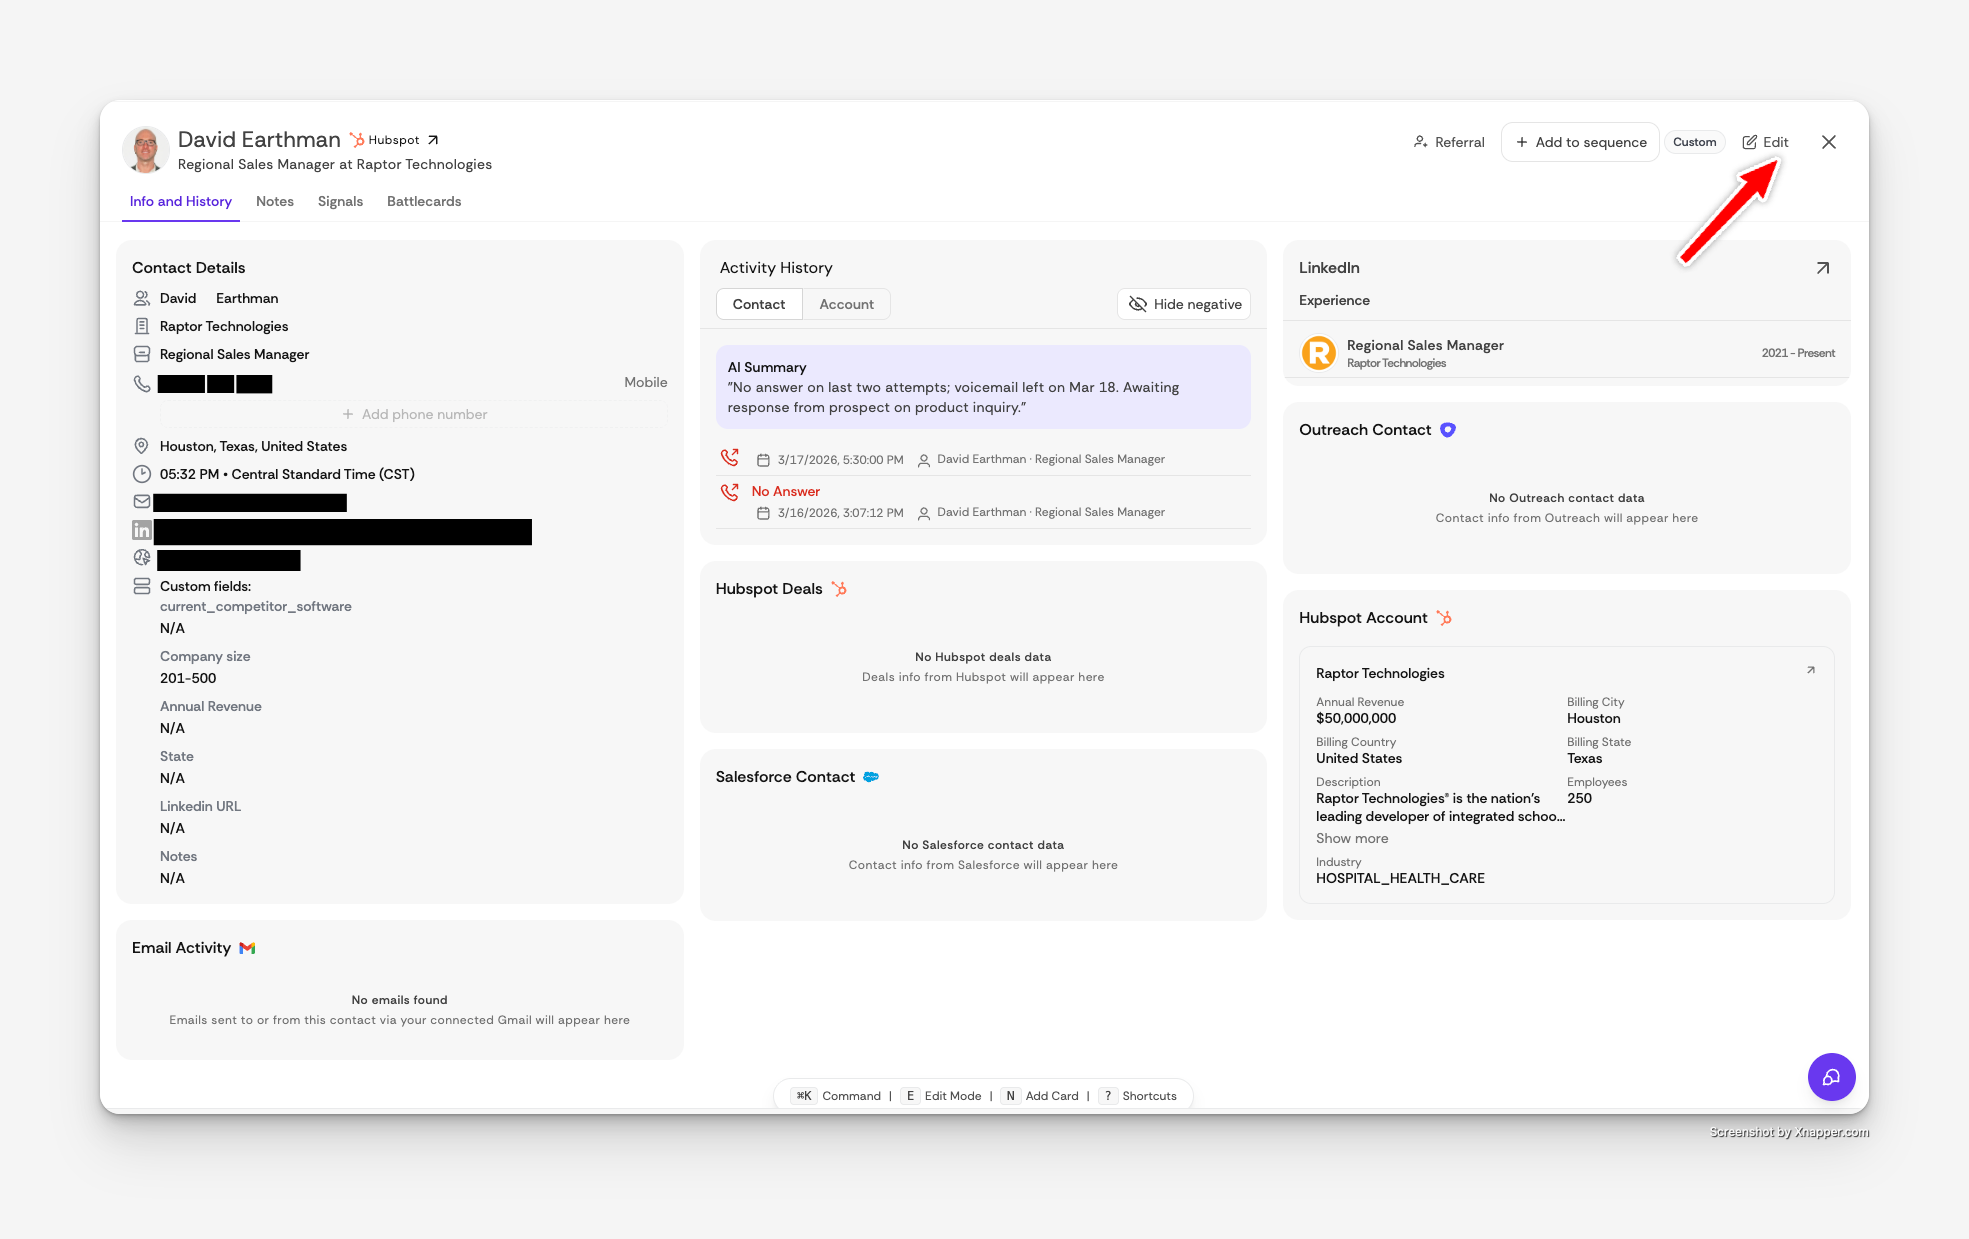
Click Edit
The pencil button sits at the top-right of the panel. You can also press E while the panel is open.
Make your changes
Every card gets a dashed border and a toolbar. A floating shortcut bar appears at the bottom of the panel: E toggles edit mode, N opens Add Card, ⌘K opens the command menu, and ? lists all shortcuts.
Click the checkmark to finish
Exiting edit mode saves your layout automatically — it syncs to your account and follows you across devices.
Moving and removing cards
In edit mode, each card shows a toolbar along its top edge:
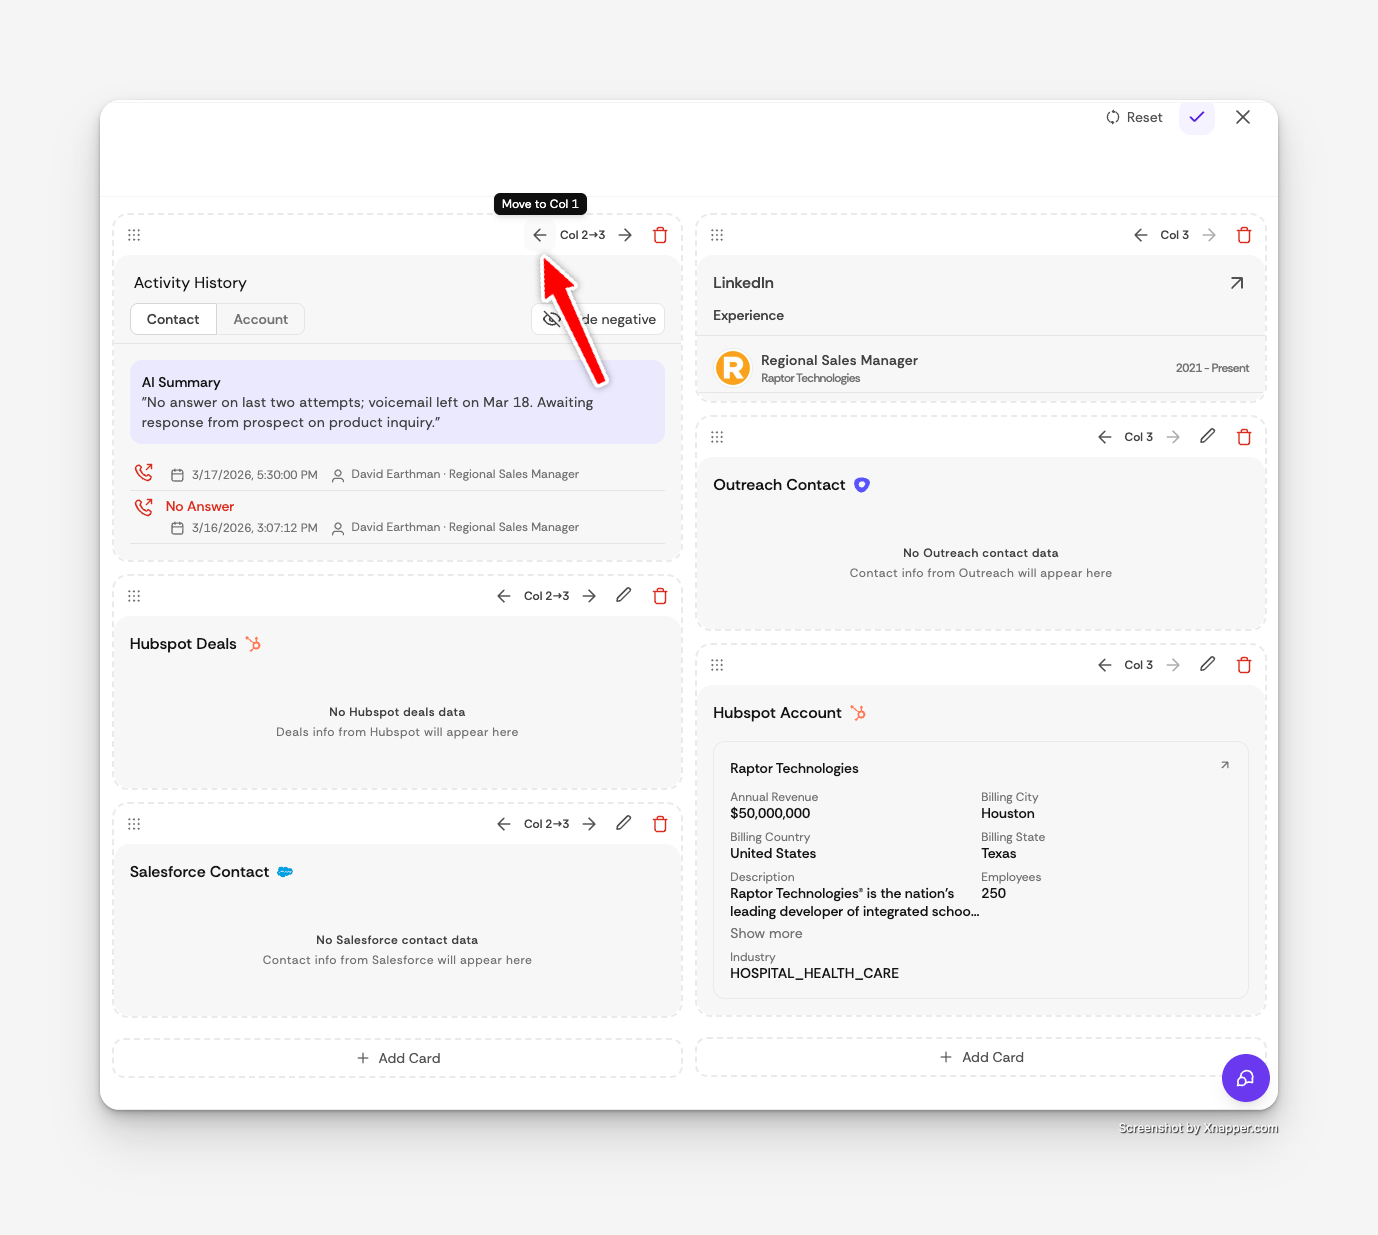
Drag anywhere on the card to move it. Drop it in another column, or above/below another card to reorder within a column — a purple line shows where it will land.
Arrow buttons (← / →) move the card one column left or right without dragging. The Col 2→3 label shows which column the card is in.
Pencil (field cards only) reopens the field picker so you can change which CRM fields the card shows.
Trash removes the card from your layout. Nothing is deleted — the card goes back into the Add Card catalog and can be re-added anytime.
Reset (top of the panel, only in edit mode) discards your personal layout and returns you to the team default — or the system default if your team hasn't set one.
Adding a card
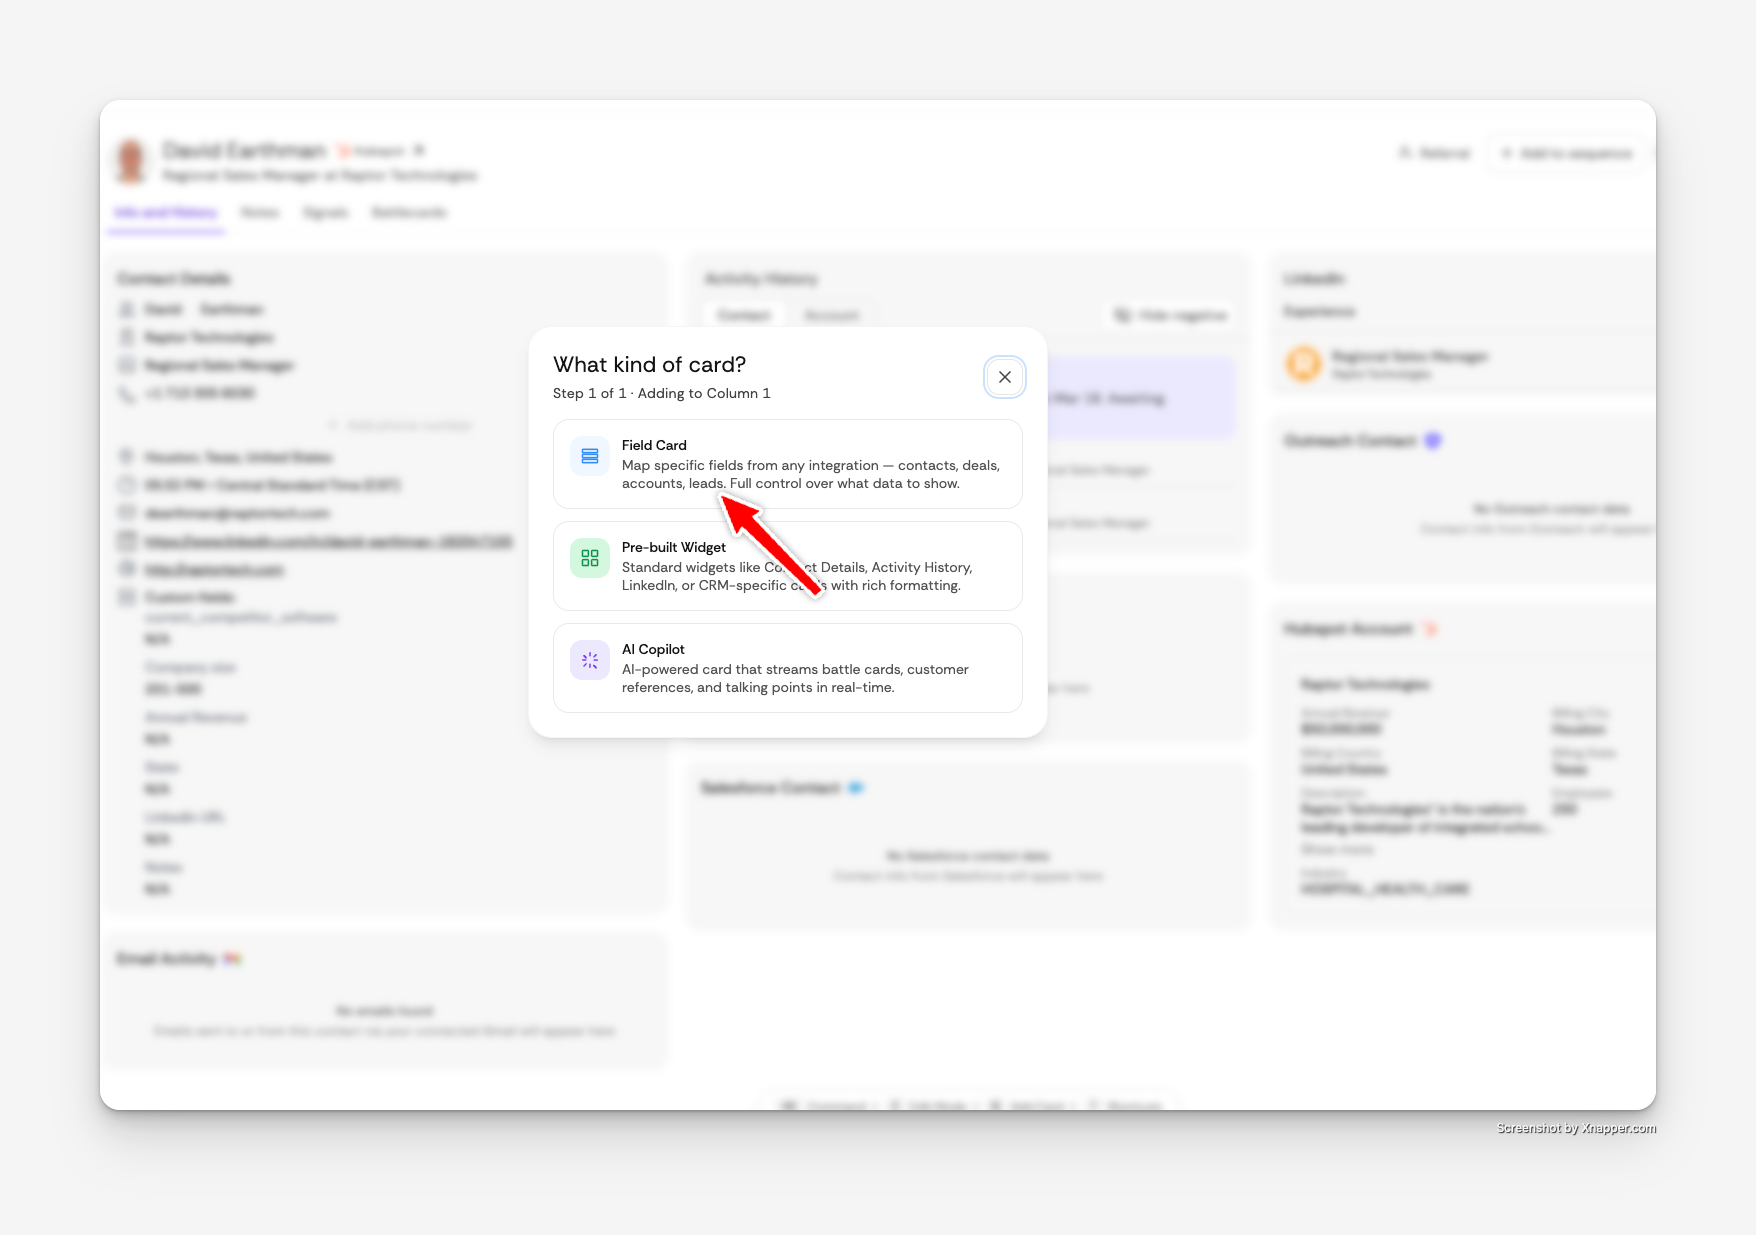
At the bottom of each column you'll find an Add Card button (or press N). It opens a short wizard — the first question is “What kind of card?”:
Field Card — build your own card by mapping specific fields from any connected integration: contacts, accounts, or deals. Full control over exactly what data shows.
Pre-built Widget — ready-made cards with rich formatting: Contact Details, Activity History, LinkedIn, and CRM-specific cards like Salesforce Contact or HubSpot Deals.
AI Copilot — an AI card that streams battle cards, customer references, and talking points during calls. It's added instantly, and only one can be on the layout at a time.
For pre-built widgets, the wizard then asks you to choose a source — widgets are grouped under General (always available) or under each connected integration — and finally to pick the widget itself. The card lands at the bottom of the column you started from.
Why don't I see a widget?
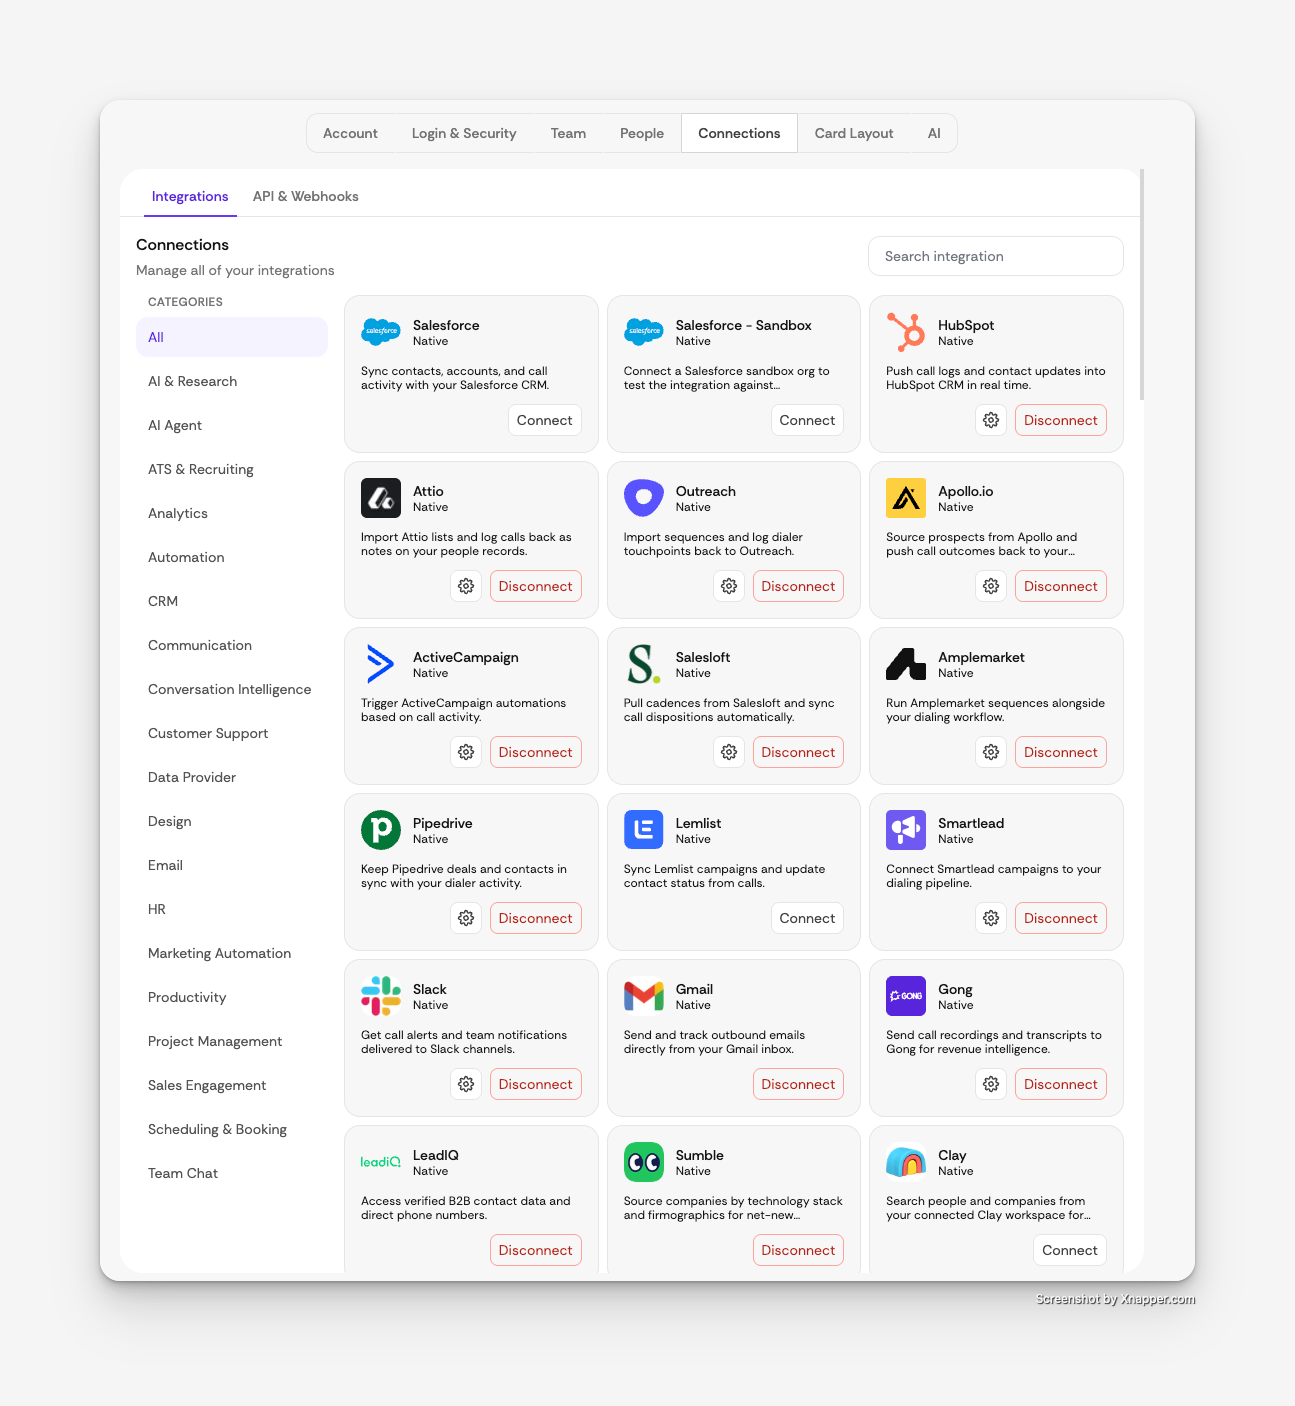
The catalog only shows widgets you can actually use: cards for an integration appear once that integration is connected in Settings → Connections, and cards already on your layout are hidden from the list.
Field cards: pick your own CRM fields
Field cards are the most flexible option — a compact card showing exactly the properties you choose from your CRM. The wizard walks you through four steps:
Choose Field Card
On the “What kind of card?” screen.
Choose the integration
You'll see every connected integration that supports field cards: Salesforce (including Sandbox), HubSpot, Outreach, Apollo, Salesloft, and ActiveCampaign.
Choose the record type
Contact (person records — name, email, phone, title…), Account (company records with firmographic data), or Deals (opportunities with stage, amount, and pipeline info). Which types appear depends on the integration — see the support matrix below.
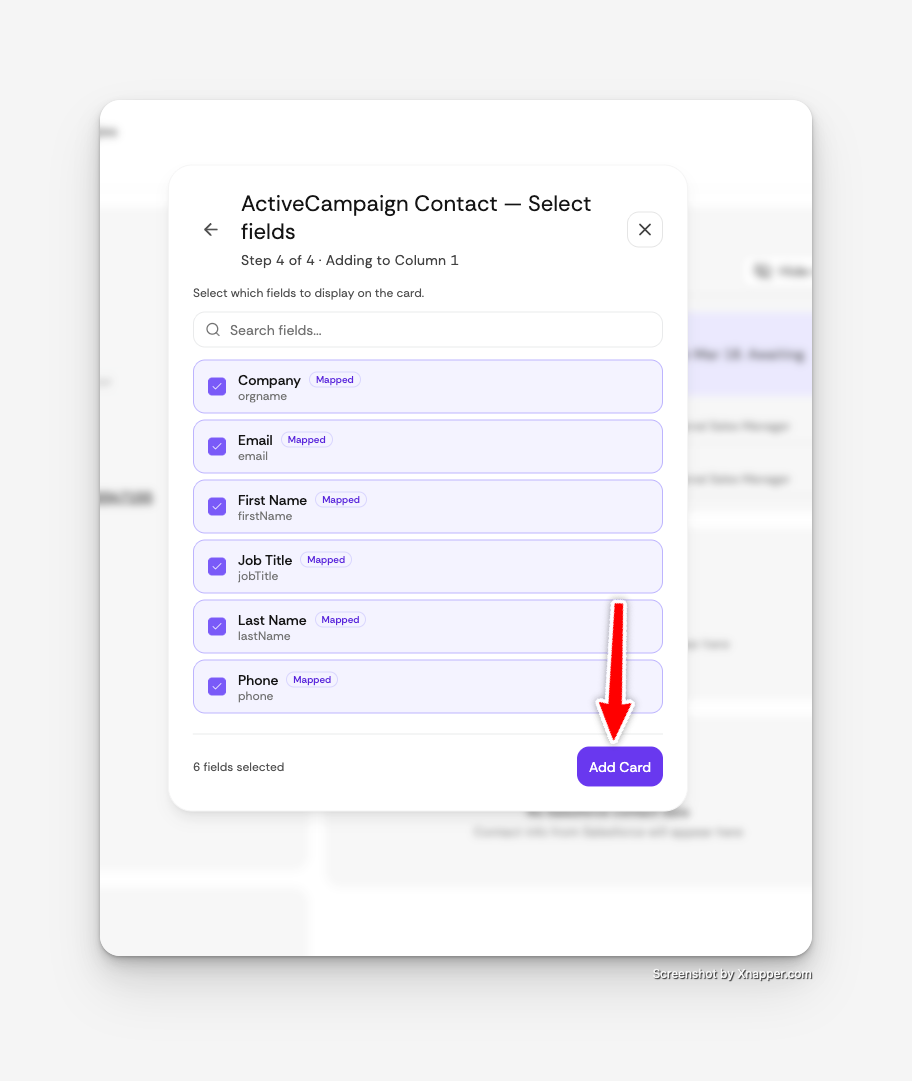
Select fields
Tick as many fields as you want, in two flavors:
Fields with a Mapped badge are curated by Salesfinity and render with clean formatting.
Below them, the full list of live fields from your CRM loads automatically — including your custom properties. Use the search box to find a field by label or API name.
Click Add Card to place it.
Tip
You can create multiple field cards from the same integration — for example, one Salesforce Contact card with qualification fields and one Salesforce Deals card with pipeline fields — and place them in different columns.
Note
If the live field list fails to load, you'll see “Couldn't load CRM fields. Showing mapped fields only.” with a Retry link — the curated Mapped fields still work while your CRM connection recovers.
Bringing in Salesforce data
Salesforce data can appear on the contact panel two ways. (Requires Salesforce to be connected in Settings → Connections; Salesforce Sandbox works the same way.)
Option A — Pre-built Salesforce widgets
Add Card → Pre-built Widget → Salesforce, then pick:
Salesforce Contact — the synced contact record.
Salesforce Account — the account the contact belongs to.
Deals & Opportunities — open and closed opportunities tied to the contact's account.
Option B — A Salesforce field card
Add Card → Field Card → Salesforce → choose Contact, Account, or Deals → select fields. Mapped contact fields include:
First NameLast NameEmailPhoneMobile PhoneTitleDepartmentAccountOwnerCityStateCountryLead StatusDescription
…plus every other standard and custom field from your Salesforce org via the live field list.
Deal and account properties
Deal properties
Deal data is available from Salesforce, HubSpot, and ActiveCampaign — either as pre-built widgets (Deals & Opportunities, HubSpot Deals, ActiveCampaign Deals) or as a Deals field card. Mapped deal fields include:
Deal NameAmountStageClose DateCurrencyOwnerIs ClosedIs WonDescription
Account properties
Account (company) data is available from Salesforce, HubSpot, Outreach, Apollo, and Salesloft — as pre-built account widgets or as an Account field card. Mapped account fields include:
NameWebsiteIndustryPhoneBilling CityBilling StateBilling CountryEmployeesAnnual RevenueOwnerDescription
As with contacts, the live field list surfaces every additional property your CRM exposes, including custom ones.
What each integration supports
Integration | Field cards | Pre-built widgets |
|---|---|---|
Salesforceincl. Sandbox | Contact · Account · Deals | Salesforce Contact, Salesforce Account, Deals & Opportunities |
HubSpot | Contact · Account · Deals | HubSpot Contact, HubSpot Account, HubSpot Deals, HubSpot Properties |
Outreach | Contact · Account | Outreach Contact, Outreach Account, Outreach Activity |
Apollo | Contact · Account | Apollo Contact, Apollo Account, Apollo Activity |
Salesloft | Contact · Account | Salesloft Contact, Salesloft Account, Salesloft Activity |
ActiveCampaign | Contact · Deals | ActiveCampaign Contact, ActiveCampaign Deals |
Gong | — | Gong Calls |
Gmail | — | Email Activity (Gmail) |
General no integration needed | — | Contact Details, Activity History, LinkedIn, AI Copilot |
Activity data (call logs, emails, engagement history) comes through the pre-built activity widgets rather than field cards.
How layouts are saved
Changes save automatically when you exit edit mode, and your layout syncs to your account.
If your customized layout ends up identical to the team default, Salesfinity drops the personal override and keeps you on the team default — so you automatically receive future updates your admin makes.
The badge in the panel header always tells you where your layout comes from: Custom (your own), Team default, or no badge (system default).
Reset in edit mode removes your personal layout and returns you to the team default, or to the system default if none is set.
When a release adds new card types, they're appended to your existing layout's catalog automatically — your customizations are never overwritten.
Setting a team default (admins)
Team owners and admins can define the layout every team member starts with. Members can still customize on top of it.
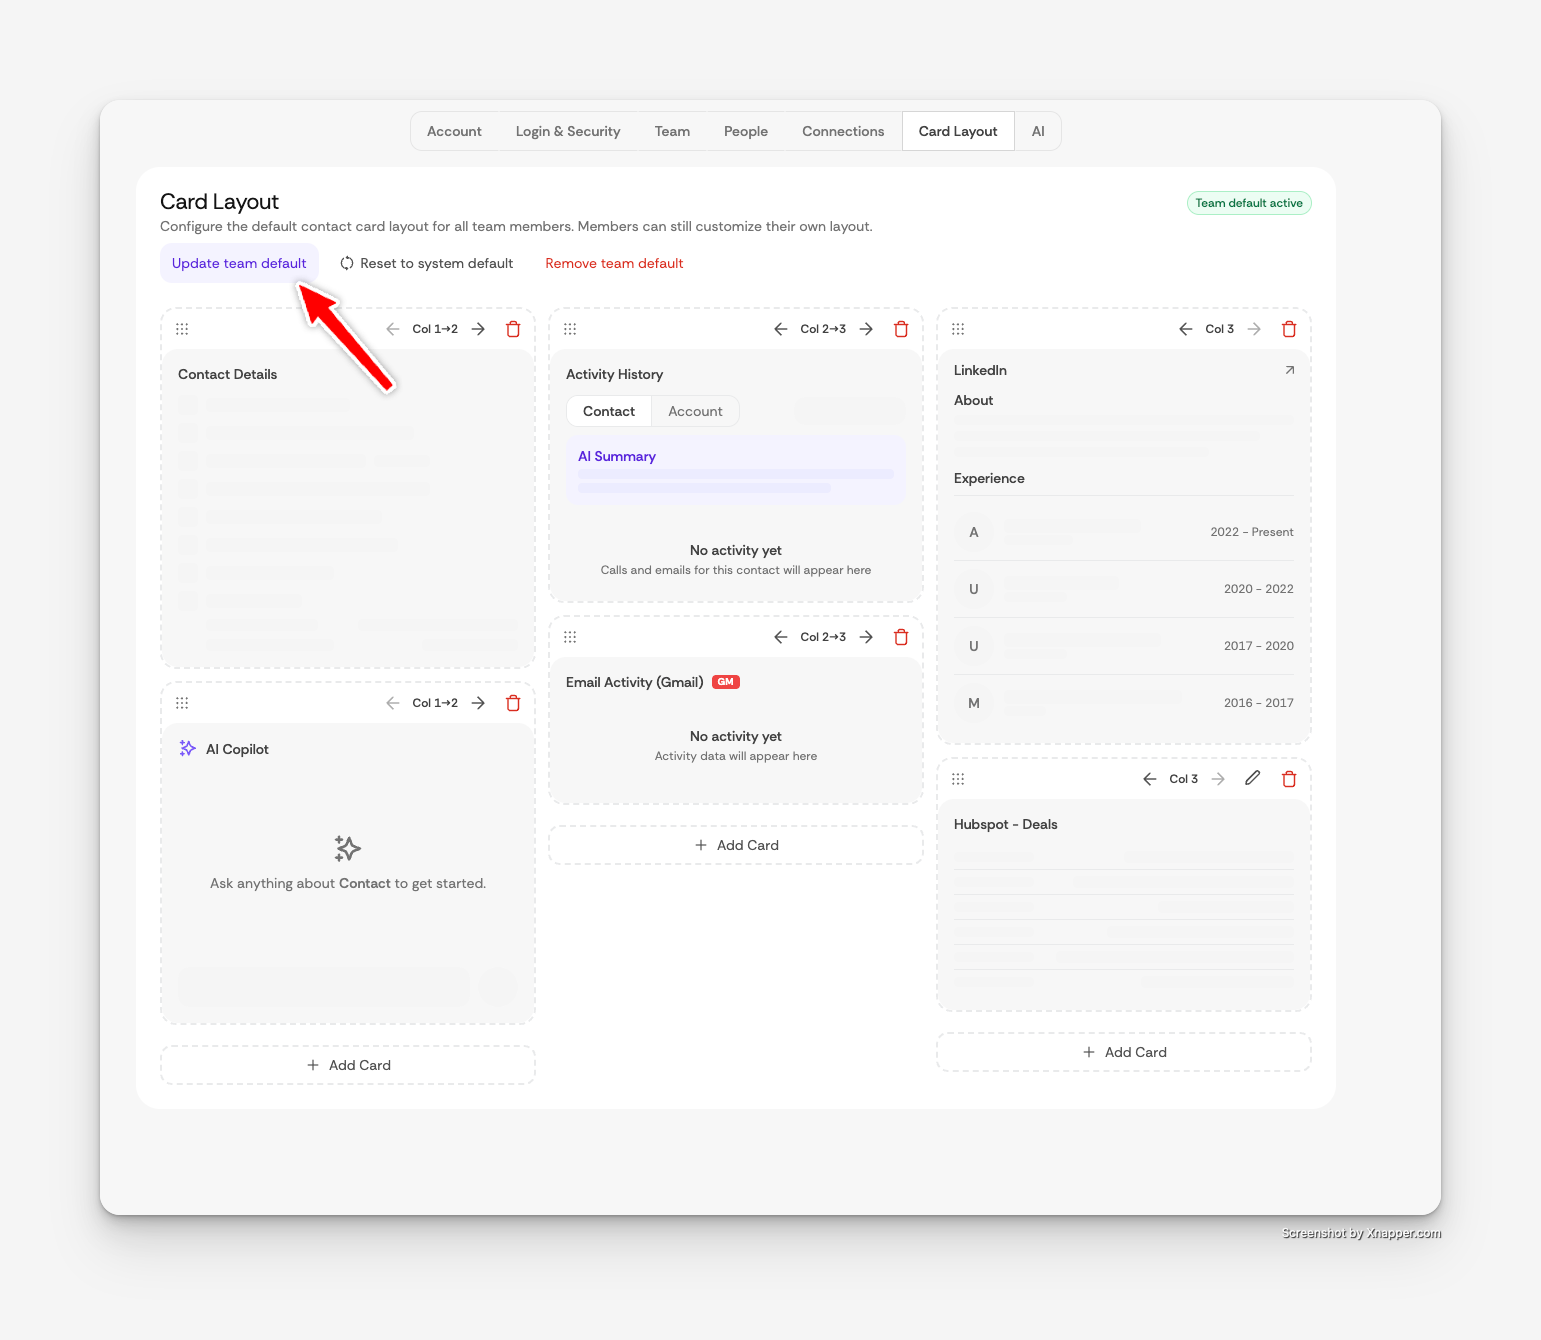
Open Settings → Card Layout
A status badge shows whether a team default is currently active: Team default active or No team default.
Build the layout
The editor works exactly like personal edit mode — drag cards between the three columns, remove cards, and add field cards or widgets — but uses preview placeholders instead of live contact data, and nothing changes for the team until you save.
Click Save as team default
(Or Update team default if one already exists.) Everyone who hasn't customized their own layout receives it immediately.
Two more controls on the same page:
Reset to system default — resets the draft in the editor back to the standard layout (doesn't affect the team until you save).
Remove team default — deletes the team default; members fall back to the system default.
Note
A saved team default replaces the starting layout for members on the system default and for members who reset. It never overwrites a member's saved personal layout.
Troubleshooting & FAQ
I don't see Salesforce (or another CRM) as an option when adding a card.
The integration isn't connected yet. Connect it in Settings → Connections, then reopen the Add Card wizard.
A widget is missing from the Pre-built list.
Cards already visible on your layout are hidden from the catalog. Check whether it's already placed in one of your columns.
The field list only shows a few “Mapped” fields.
The live fetch from your CRM may have failed — use the Retry link in the picker. Mapped fields keep working in the meantime.
Can I add AI Copilot twice?
No — one AI Copilot card per layout. The option shows “Already added” once it's placed.
Do my changes affect my teammates?
No. Editing from the contact panel only changes your layout. Team-wide changes are made only from Settings → Card Layout by an owner or admin.
I removed a card by mistake.
Nothing is lost — open Add Card and re-add it, or click Reset to return to your team's default.
How do I change which fields an existing field card shows?
Enter edit mode and click the pencil on that card — the field picker reopens with your current selection, and Save Changes updates the card in place without moving it.